
Remember the magic of holiday baking when you were a kid, pulling out trays of cookies that looked like works of art? That’s exactly what I think of every time I make Stained Glass Cookies. These beautiful treats feature a buttery sugar cookie base with colorful candy centers that melt into shimmering, stained-glass-like designs—perfect for gifting or dazzling at parties. I’ve been baking them for years, and they never fail to wow everyone who tries them.
In my experience, Stained Glass Cookies are surprisingly easy to whip up, even if you’re not a pro in the kitchen. The key is using simple ingredients that come together quickly, but the result feels so special. If you’re looking for a fun project that combines creativity with deliciousness, this is it. I’m excited to share my go-to recipe for Stained Glass Cookies, complete with tips to make yours shine.
Whether it’s for Christmas, birthdays, or just because, these homemade Stained Glass Cookies will become a favorite in your baking rotation. Let’s dive in and get started—you won’t believe how straightforward it is to create something this stunning. For more cookie inspiration, check out our snickerdoodle cookies recipe or try our lemon crinkle cookies.
Grab This Chef Knife Now - Almost Gone!

- Stays Razor-Sharp: Ice-hardened blade keeps its edge longer than ordinary knives
- Superior Grip Control: Unique finger hole design gives you perfect balance and safety
- Built to Last a Lifetime: Premium stainless steel blade with elegant beech wood handle
- ✓ Finally, a knife that stays sharp and feels comfortable in my hand
- ✓ Professional quality without the premium price tag
- ✓ Makes meal prep faster and more enjoyable
⏰ Only a few items left in stock - order soon
Key Takeaways:
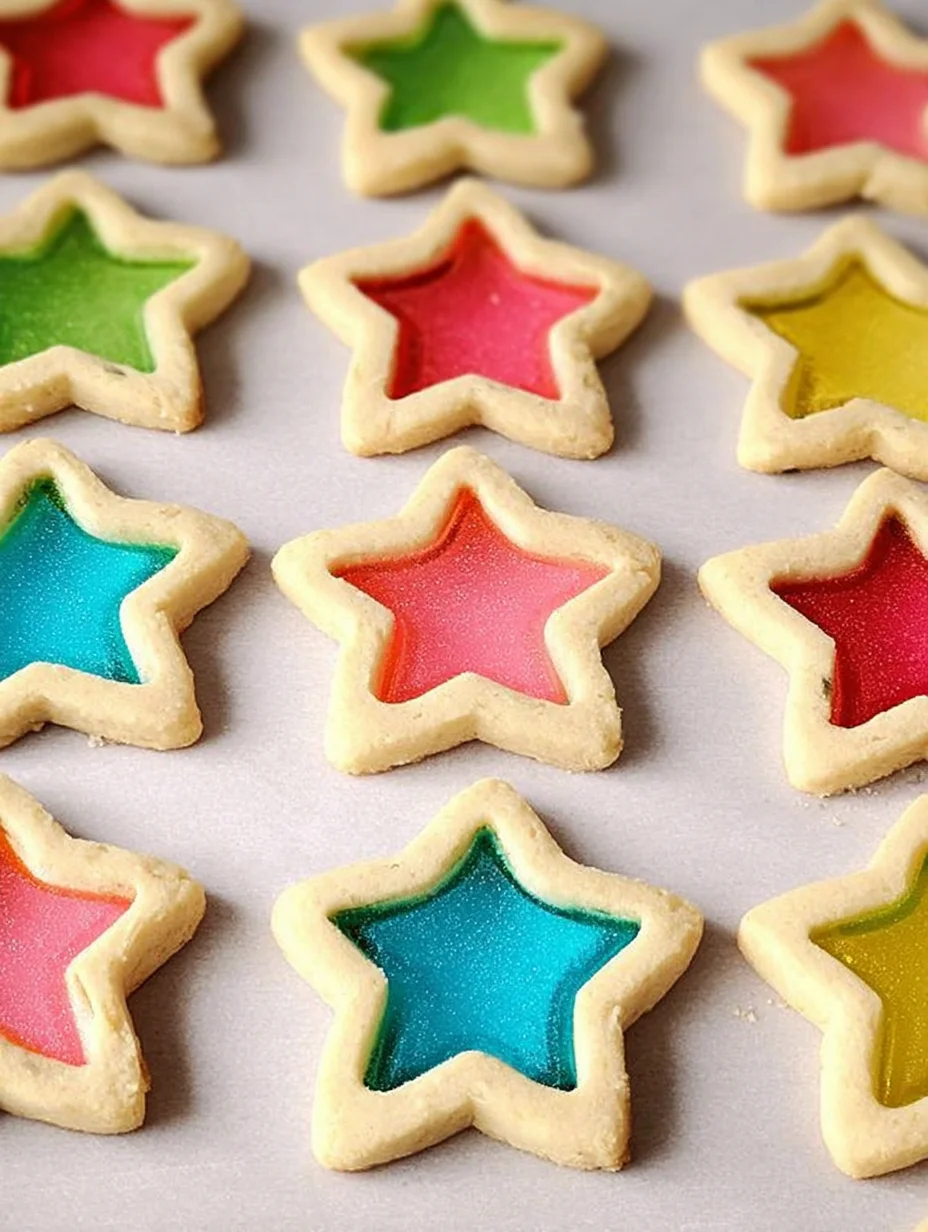
- Stained Glass Cookies create a stunning visual effect with melted candy centers, making them ideal for holiday displays or gifts.
- Prep and bake time is under an hour, perfect for quick baking sessions without sacrificing quality.
- The buttery flavor pairs beautifully with the sweet, fruity candy melts for a delightful taste explosion.
- Chill the dough for at least 30 minutes to ensure crisp edges and vibrant colors in your Stained Glass Cookies.
- Store in an airtight container for up to a week; they freeze well for longer enjoyment.
Why You’ll Adore This Stained Glass Cookies
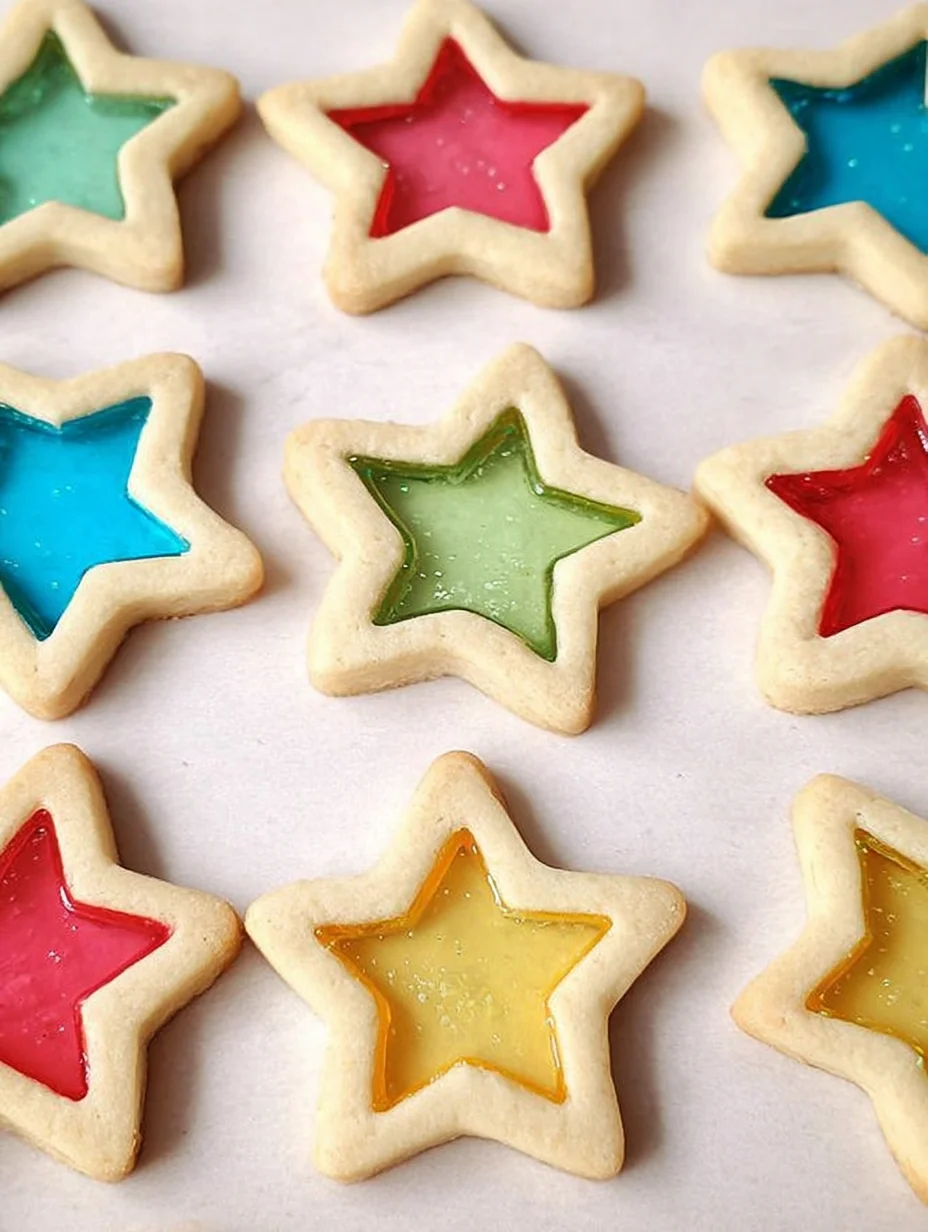
Visual Wow-Factor: Imagine pulling cookies from the oven with jewel-toned centers that sparkle like real stained glass—it’s pure magic. These Stained Glass Cookies turn ordinary baking into an artistic adventure, delighting kids and adults alike. I’ve seen eyes light up at parties just from the sight of them.
Simple Yet Impressive: You don’t need fancy equipment; basic kitchen tools get the job done. What I love is how these Stained Glass Cookies feel gourmet but come together effortlessly, leaving you more time to enjoy the process. They’re a hit for beginners wanting to impress.
Customizable Fun: Choose your favorite hard candies to personalize the colors and flavors. This flexibility makes Stained Glass Cookies endlessly versatile for any occasion. It’s a creative outlet that keeps baking exciting every time.
Family Bonding Experience: Baking these together is a joyful way to make memories. The kids can help crush the candies and cut shapes, turning it into a fun activity. Honestly, it’s one of my favorite ways to spend an afternoon with loved ones.
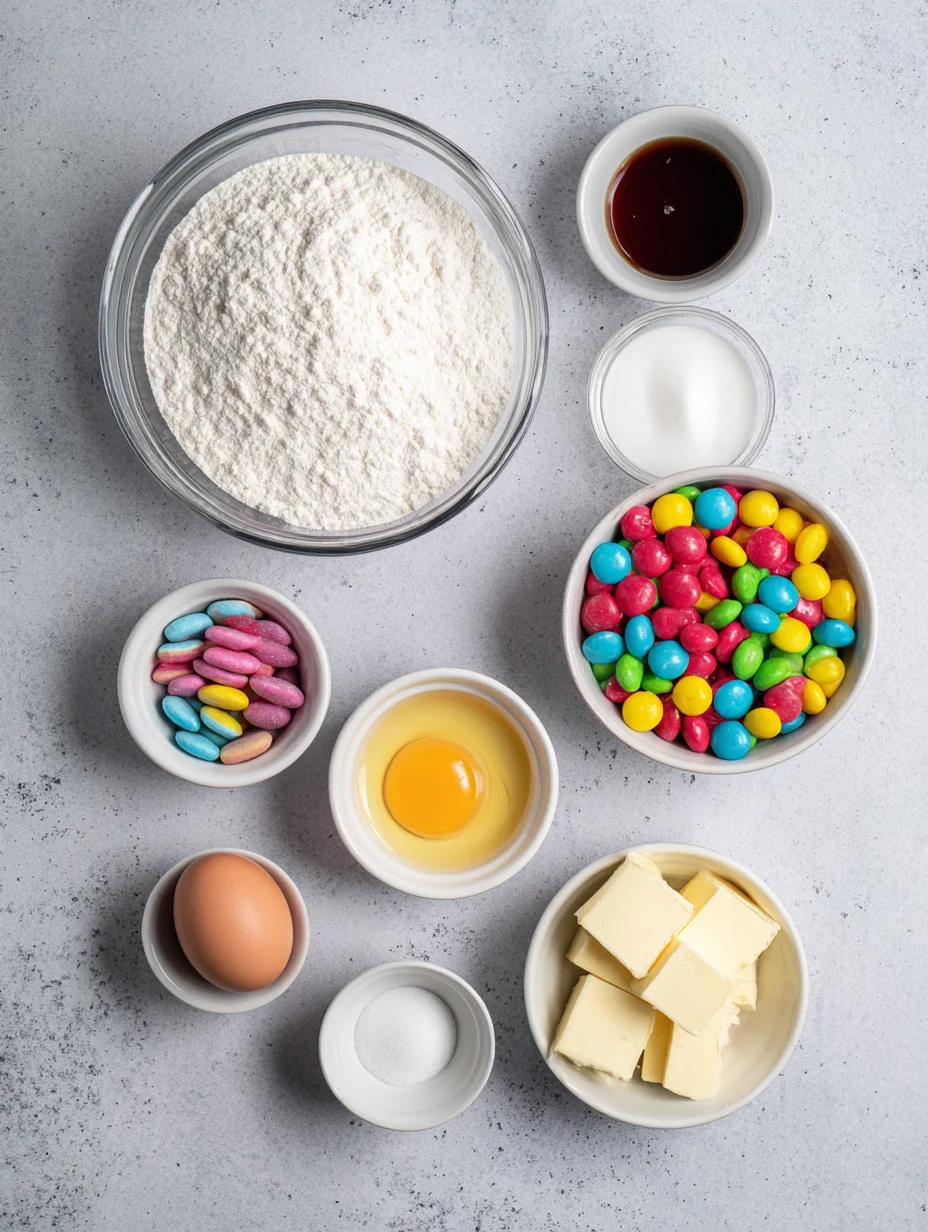
Essential Ingredients for Stained Glass Cookies
Unsalted Butter: This is the heart of the cookie dough, providing that rich, melt-in-your-mouth texture we all crave. Softened to room temperature, it creams beautifully with sugar for a tender crumb. In my Stained Glass Cookies, it ensures the base holds up around the candy without spreading too much during baking. Without it, you’d miss that classic buttery flavor that makes these cookies irresistible.
Granulated Sugar: The sweetness backbone, it not only adds flavor but helps the dough achieve the perfect spread and crispness. I always use fine granulated for even mixing, avoiding any graininess. For Stained Glass Cookies, it balances the tartness from the fruit-flavored candies, creating harmony in every bite. It’s a staple that keeps things simple and delicious.
Assorted Hard Candies: These are the stars, crushed into the centers to melt into gorgeous, translucent designs. Options like Jolly Ranchers in various colors let you customize the look for holidays or themes. When making Stained Glass Cookies, they add a fruity pop that contrasts wonderfully with the vanilla dough. Choose your favorites to make each batch uniquely yours.
How to Make Stained Glass Cookies
Prepare the Dough
Start by creaming together softened butter and sugar in a large bowl until light and fluffy—about 2 minutes with an electric mixer. Beat in the egg and vanilla extract until fully incorporated, then gradually add the flour, baking powder, and salt. Mix just until a soft dough forms; don’t overwork it to keep your Stained Glass Cookies tender. In my experience, wrapping and chilling this dough for 30 minutes makes rolling it out a breeze and prevents sticking.
Now, on a lightly floured surface, roll the dough to about 1/4-inch thickness. Use cookie cutters to create shapes like stars or hearts, placing them on a parchment-lined baking sheet. For the signature look, use a smaller cutter to remove centers from half the shapes—this is where the magic of Stained Glass Cookies happens. Here’s the thing: even edges ensure the candy melts evenly without leaking.
Fill with Candy Centers
Crush your hard candies into fine pieces using a food processor or by placing them in a zip-top bag and hammering gently—wear safety glasses for this fun step. Spoon about a teaspoon of crushed candy into each cutout center, spreading it evenly but not overflowing. As the Stained Glass Cookies bake, the candy will melt into a glossy window, so precision here pays off. I find sorting candies by color beforehand streamlines the process and boosts the visual appeal.
Preheat your oven to 350°F and bake for 8-10 minutes, watching closely as the edges turn golden and the candy fully liquifies. Let them cool on the sheet for 5 minutes before transferring to a wire rack—the centers harden quickly into that stunning stained glass effect. These Stained Glass Cookies are best enjoyed fresh, but patience during cooling prevents breakage.
Ingredients
- 1/2 cup unsalted butter, softened
- 1/2 cup granulated sugar
- 1 large egg
- 1 teaspoon vanilla extract
- 1 1/2 cups all-purpose flour
- 1/2 teaspoon baking powder
- 1/4 teaspoon salt
- Assorted hard candies (about 1/2 cup total, crushed)
Stained Glass Cookies Instructions
- Cream butter and sugar until fluffy; beat in egg and vanilla.
- Mix in dry ingredients to form dough; chill 30 minutes.
- Roll out, cut shapes with centers removed; fill with crushed candy.
- Bake at 350°F for 8-10 minutes until edges are golden.
- Cool completely before storing or serving.
Pro Tips for the Best Stained Glass Cookies
Chill the Dough: Always refrigerate for at least 30 minutes to maintain shape and sharp designs in your Stained Glass Cookies.
Grab This Kitchen Scale Now — Best Precision Pick!

- Razor-Accurate Every Time: Dual-increment precision down to 0.1g — perfect for baking, meal prep, and portion control with g, oz, ml, and fl'oz modes.
- Smart Removable Bowl Design: Detachable bowl doubles as a protective case for compact storage. Tare function lets you weigh ingredients in any container with zero fuss.
- Built for Everyday Convenience: Auto-zero, tare function, low battery alert, overload indicator, and 2-minute auto-off to extend battery life — all in a sleek stainless steel build.
- ✓ "Perfect for baking — precise, lightweight, and stores easily without wasting counter space"
- ✓ "A game changer! Weighing ingredients is now way more accurate than measuring cups"
- ✓ "Love the 0.1g precision and backlight — best food scale I've owned. Highly recommend!"
⏰ Only a few items left in stock - order soon
Crush Candies Finely: Finer pieces melt more evenly, preventing bubbles or uneven coloring—pulse in a processor for best results.
Cool on the Pan: Let them set for 5 full minutes post-bake to avoid cracking as the candy hardens.
You Must Know
- Stained Glass Cookies are best baked on parchment paper to catch any candy overflow and ensure easy release.
- Use oven mitts when handling fresh trays—the melted candy can be very hot.
- These cookies are naturally gluten-free adaptable with a 1:1 flour swap.
- Avoid humid days for baking to prevent sticky candy centers from softening too quickly.
How to Store Stained Glass Cookies
Once completely cooled, layer your Stained Glass Cookies in an airtight container with parchment between layers to protect the delicate designs—they’ll stay fresh for up to a week at room temperature. For longer storage, freeze them in a single layer first, then transfer to a freezer bag for up to three months; thaw at room temp to regain crispness. If the weather is humid, the fridge works too, but bring them out 30 minutes before serving to avoid condensation dulling the shine.
Customizing Your Stained Glass Cookies
Swap vanilla for almond extract in the dough for a nutty twist, or add a pinch of cinnamon for warmth in your Stained Glass Cookies. If you’re dairy-free, use plant-based butter and it works just as well—I’ve tested it successfully. For variations, try incorporating lemon zest like in our lemon cookie recipe to brighten the flavors. Experiment with candy types, but stick to hard varieties that melt cleanly without browning.
What to Serve with Stained Glass Cookies
These cookies shine alongside a hot cup of tea or coffee, where the fruity candy notes complement the beverage’s warmth. Pair them with fresh fruit like berries for a light dessert spread, or crumble over vanilla ice cream for an indulgent treat. For parties, arrange on a platter with nuts and cheeses— the colors pop beautifully. Don’t overlook a simple milk or hot chocolate side; it’s nostalgic and always a crowd-pleaser.

Stained Glass Cookies Recipe
These stained glass cookies are so pretty and they're REALLY EASY to make. Impress your guests with these beautiful AND tasty sugar cookies!
Timing
Recipe Details
Ingredients
- 01 1 cup Sugar
- 02 1/2 teaspoon Salt
- 03 1 Tablespoon Vanilla extract
- 04 1 Egg (large)
- 05 3/4 cup Butter (room temperature)
- 06 2-1/2 cups Flour (all purpose)
- 07 16 Jolly ranchers
Instructions
Gather your cookie ingredients and supplies.
Add the sugar, salt, vanilla, egg, and room temperature butter to a mixing bowl.
Combine the ingredients in a stand mixer or with a hand mixer.
Add the all purpose flour and mix until the dough starts to clump together.
Transfer the dough to your working surface and knead briefly.
Cover your dough with plastic wrap and chill in the refrigerator for 1 hour.
Unwrap two jolly ranchers and place them in a plastic baggie.
Use a hammer or meat mallet to crush the jolly ranchers into very small pieces. Powder is okay as well, but try and get rid of any large chunks.Repeat with other jolly rancher colours. Two jolly ranchers will fill 3 - 4 cookies, depending on your cut out size.
Add flour to your working surface. Place the dough on top and add a bit more flour on top of the dough.
Roll out the dough until it's just over 1/4 inch thick.
Use a cookie cutter to cut out star shapes, or whatever shape you'd like!
Place the cookies on a parchment lined baking tray.You can also use a silicone mat, but you need to cover your baking sheet with something to stop the candy from sticking.
Cut out the centers of the cookies with a smaller cookie cutter of a similar shape.
Fill the center of the cookies with the crushed candies. Make sure they don't overflow; just add enough to cover the hole.Try and remove any pieces that fall on the top of the cookies prior to baking.
Preheat your oven to 350F and bake the cookies for 12 minutes.Allow the cookies to cool on the tray for 20 - 30 minutes, until the candy center has hardened.
Your stained glass cookies are complete!
FILED UNDER:
NUTRITION FACTS (PER SERVING)
Nutrition information is calculated using an ingredient database and should be considered an estimate. In cases where multiple ingredient alternatives are given, the first listed is calculated for nutrition. Garnishes and optional ingredients are not included.
Frequently Asked Questions About Stained Glass Cookies
Can I make Stained Glass Cookies ahead of time?
Absolutely, prepare the dough up to two days in advance and store it chilled, or bake and freeze the cookies for up to three months. Thaw at room temperature before serving to preserve the crisp texture. It’s a great way to get a head start on holiday baking without last-minute stress.
How long does Stained Glass Cookies last in the fridge?
Your Stained Glass Cookies will keep well in the fridge for about 10 days in an airtight container. The candy centers hold up fine, but the dough might soften slightly—let them come to room temp for the best crunch. Avoid direct contact with moist foods to maintain vibrancy.
Are Stained Glass Cookies gluten-free?
They can be with a gluten-free 1:1 flour blend; I’ve made batches this way with no issues in texture or taste. Just ensure your baking powder is gluten-free too. It’s a simple swap for inclusive baking.
What if my Stained Glass Cookies spread too much?
Chilling the dough longer, up to an hour, prevents spreading—it’s all about that cold fat. Measure ingredients precisely, as too much butter can cause issues. Your next batch of Stained Glass Cookies will hold perfect shapes.
Can kids help make Stained Glass Cookies?
Yes, they’re a fantastic kid-friendly project; little ones love crushing the candies and choosing shapes. Supervise the oven and hot trays for safety. It turns baking into memorable fun for everyone involved.
How do I clean up after making Stained Glass Cookies?
Wipe pans immediately after cooling to avoid hardened candy residue—warm soapy water works wonders. For the cookie sheet, a quick soak loosens any spills. Your Stained Glass Cookies are worth the minimal extra effort.
Can I use royal icing on Stained Glass Cookies?
Once fully cooled, yes—pipe outlines to enhance the designs without melting the centers. It adds a decorative touch for gifting. Check out our creme brulee cookies recipe for more icing ideas.
Why choose fruit candies for Stained Glass Cookies?
Fruit hard candies melt clear and vibrantly, creating true stained glass effects, unlike chocolates that might ooze. They add complementary flavors too. For alternatives, try our espresso chocolate chip cookies if you want a non-fruity twist.
Final Thoughts
From the first creamy mix to the last colorful bite, these Stained Glass Cookies bring joy and creativity to your kitchen. I’ve shared countless batches with friends and family, and they always rave about the stunning results. Give this recipe a try—you’ll love how easy it is to make something so beautiful and tasty. Head to the store, gather your ingredients, and bake up some magic today!